Bringing your Notion database to life with Eleventy
Posted on: 25 August 2022
Notion is an excellent productivity tool, which I use extensively for my daily journalling. Another awesome tool I use as a developer is Eleventy (11ty). 11ty is a static site generator built in Node.js. A static site generator means the building of webpage occurs in a separate process to viewing the website. This has the huge benefit of serving up a load of uncomplicated, plain HTML pages to the end user, really fast.
Why I chose Notion
As much as I enjoy the concept of privately journalling daily, my true goal was to use the data I was collecting each day and putting it on public record. I love habit tracking as a means of personal growth, and having it out there for all to see on my personal website is a great way to stay accountable and consistent.
One of the criteria for choosing Notion initially as my journalling platform was its API. Its JS client is easy to use and got me up and running nice and quick. After installing the Notion client package, in code, the first step is to create a new client object, using your secret token (skip to Getting hold of your credentials):
const { Client } = require("@notionhq/client");

const notion = new Client({
  auth: process.env.NOTION_SECRET
});
You’ll want to store your secret as an environment variable to save committing it to your code. If you're using Netlify in production, you should set a build environment variable. In development, you can use an .env file to define key=value variables, e.g.:
NOTION_SECRET=<your secret here>
Read more about environment variables in Netlify.
My journal data is in a single database, which makes it easy to pull out. The following code does the trick:
const beforeDate = new Date;

beforeDate.setDate(beforeDate.getDate() - (beforeDate.getDay() || 7));

await notion.databases.query({
  database_id: "<YOUR DATABASE ID>",
  filter: {
    property: 'Auto Date',
    date: {
      on_or_before: beforeDate.toISOString().split('T')[0]
    }
  }
});
This queries Notion for a specific database ID (which you need permission to read; more on that later), with a filter on the “Auto Date” column. Filters work basically exactly like they do in the UI, which is cool. For my purpose, I only want entries in the database before a particular date. beforeDate is set to the first day (Monday) of the current week. This ensures I always get complete weeks of data returned from the API.
Paginating and caching
By default only the first or last 50 (depending on your sorting logic) are returned. To retrieve all of your entries, you’ll need to pass in the start_cursor param and recursively loop until the cursor value comes back null in the response. The database query will return a next_cursor parameter until there are no more entries to fetch.
Additionally, you may want to cache this data, certainly during development, to save being rate-limited by Notion (and also to significantly speed up development). You can use the excellent eleventy-fetch plugin to do this.
Making sense of Notion data
Notion returns field data in a slightly unintuitive format which tripped me up at first. To retrieve the value of a text field, for example, the following code is required:
row.properties['TV'].rich_text.map(text => text.plain_text).join()This is due to the fact that a text field in Notion can contain things like links, mentions, annotations, equations, or just simply plain text. Most of the time, I just want the plain text. An exception to this is when I want to retrieve the URL in my “Letterboxd Watch” field:
row.properties['Letterboxd Watch'].urlMulti-selects are fairly intuitive to inspect:
row.properties['Tags'].multi_select.map(tag => tag.name)Lastly, I use the following code to retrieve the date value of my “Auto Date” formula field:
new Date(row.properties['Auto Date'].formula.date.start.split('T')[0])field.formula will return different properties depending on the type of result the formula returns. String, number, boolean and data formats are supported. For my “Auto Date” field I call the date property, then inspect the start date. All dates have a start value; date ranges will also have an end value. I then remove the unused time part, and convert the remaining string into a Javascript Date object.
Why I decided on weeks
The next conundrum was how to display the daily journal data. I didn’t want to reveal the day-to-day minutiae of my life, but wanted to group data in a logical and consistent way to be able to make comparisons. I settled on a weekly format, as a week is a decent enough period of time to repeat, is consistent year-on-year, and is frequent enough to keep the feed feeling fresh.
I grouped my large array of daily data using a reduce statement:
const { weekNumberYear } = require('weeknumber');

const byWeek = entries.reduce((all, day) => {
  const { week, year } = weekNumberYear(day.date);
  all[year] = all[year] || {};
  (all[year][week] = all[year][week] || []).push(day);
  return all;
}, {});
I group all the entries first by year, then by week number. Here I use the very helpful weeknumber package to determine the official “ISO” week number for each day. I learned there’s a defined logic which determines the first week of a given year, which may start in December, or several days into January.
Once grouped into weeks, I loop over each year, then each week and calculate some vital stats for the week:
- How many todos I completed that week
- How many todos remained at the end of the week
- How many todos added that week
- A collation of tags
- Films watched & reviewed
- TV shows watched
- Podcasts listened to
- Books finished & started
- Total run distance (via external Spreadsheet synced with Strava)
- Total walk distance (via external Spreadsheet synced with Strava)
For each year, I also loop over each week and total up the number of books, films, TV shows and podcasts consumed for my top-of-the-feed aggregation.
Getting hold of your credentials
There are three important steps to get access to our Notion data via the API: a client secret, your database ID, and read permissions to said database.
First, you’ll need to create a new integration in Notion. For my purposes, I choose “Weekly Feed” as my integration name, selected just “Read content” (no point risking accidental data loss) and “No user information” for my user capabilities.
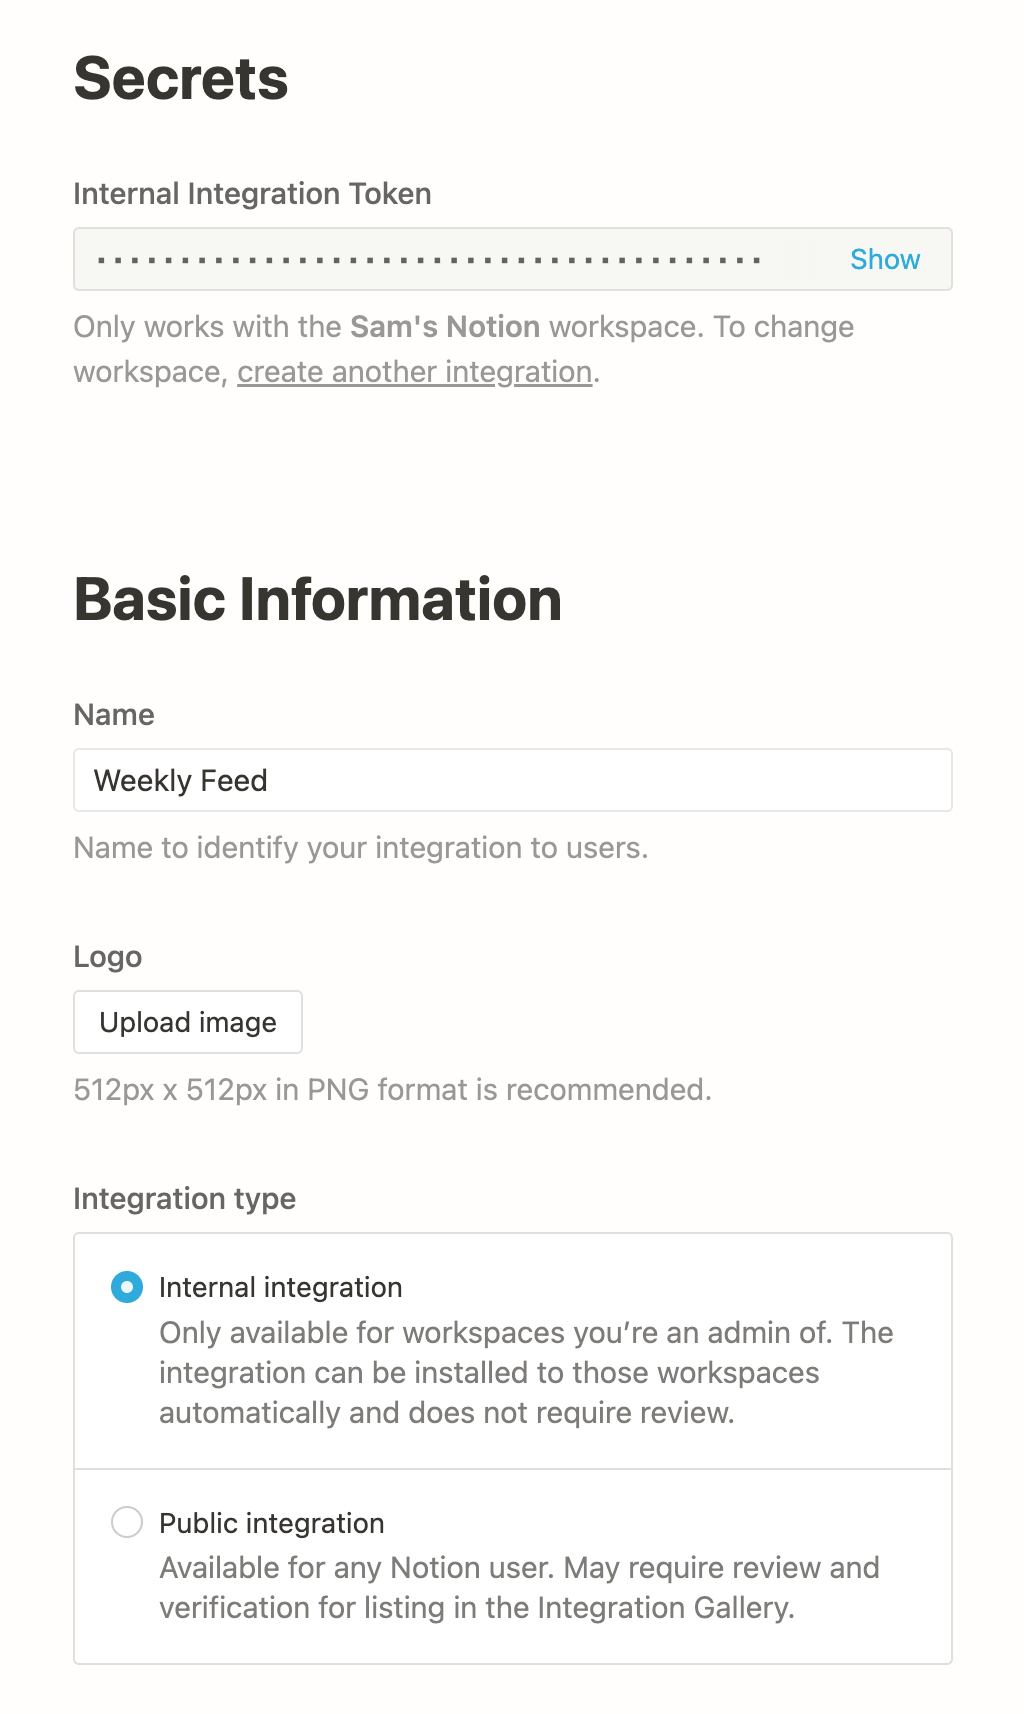
This will create an Internal Integration which is only available for workspaces I am an Admin for, which is exactly what I need; and means no messing about with OAuth is required.
Once your integration is ready to go, the next step is to grab your database ID. The easiest way I’ve found to get this is to hit the “Share” button in the top right corner of the database page, then select Copy Link. Within this URL is your database ID. You want everything after the domain and everything before the query string: https://www.notion.so/<YOUR DATABASE ID>?v=abcdefg.
The final step is to grant permission for your new integration to access this page. Once again, click the “Share” button on your page, then in the text box, start typing the name of your integration (e.g. “Weekly Feed”). It will autocomplete and hopefully show your newly created integration with “Shared with workspace” next to it. Select this, and you’ll be able to start querying data on this page using the API. Neat!
Outputting the data in Eleventy
To output the processed Notion data in a template, we need to ensure all the code that communicates with Notion and processes the data is in a data file. Let’s call it feed.js. For Eleventy to access this data file successfully, we need to export an asynchronous function which returns the data:
// feed.js

module.exports = async function() {
  // all the code here

  return data;
};
Eleventy will then register the variable feed to use in a template. My feed.liquid template then uses frontmatter and pagination to set up the year grouping, and outputs the weekly entries for that year:
// feed.liquid

---
layout: layout.liquid
eleventyComputed:
  title: "Weekly Stats for {{ year }}"
  metaDescription: A week-by-feed feed for {{ year }} consisting of data from my journal's daily entries.
pagination:
  data: feed
  size: 1
  alias: year
permalink: "feed/{{ year | slug }}/"
---

{% assign yearFeed = feed[year] %}

<div id="feed">
	{% for entry in yearFeed.weeks %}
    <div id="week{{ entry.week }}">
		  <!-- Entry markup -->
    </div>
	{% endfor %}
</div>
The possibilities are endless
There’s plenty more we can do with the feed data. For example, I recently implemented a “Recently” section on my homepage. This grabs the most recent week from the feed, and plucks out the books, podcasts and TV shows I consumed that week.
Because I don’t start a new book each week, I use some nifty logic which iterates week-to-week to find the last book I started, providing all subsequent weeks have at least one “Books” tag (meaning I read the book that week):
function currentlyReading(weeks) {
  const books = [];

  for (i in weeks) {
    // weeks[0] is latest week
    let week = weeks[i];

    if (week.books_finished.length && i == 0) {
      books.push(week.books_finished);
    } else if (week.books_started.length) {
      books.push(week.books_started);
    }

    if (books.length) return books;

    if (!week.tags.map(t => t.tag).includes('Books')) return [];
  };
}
Notion makes consuming other data files very straight forward. In the recently.js data file, I use require to pull in my feed data. Because feed.js exports an asynchronous function, we can retrieve the feed data by awaiting the function call:
const feed = require('./feed');

module.exports = async function() {
  const data = await feed();
  const currentYear = Object.keys(data).pop();
  const lastWeek = data[currentYear].weeks[0];
  const recently = [];

  ..

  return recently;
};
Automating the rebuild
Due to the fact my weekly feed is built on human-entered data, I haven’t made any steps to automating this process yet. Mostly because sometimes I won’t log until the following day, or I’ll go back through the week and fill in a few missing Podcast titles.
Because of this, I perform a manual rebuild of my site in Netlify. Rebuilding the main branch will deploy the changes “live” immediately, however. So I’ll typically rebuild a Pull Request (PR) I have lying around. Not the cleanest approach, but this then gives me a “preview” URL showing my updated feed. I can make any tweaks needed in Notion, before rebuilding my main branch, publishing the feed changes onto my site.
Something I’ve considered in the past is an automated weekly script that programatically creates a new PR in Github and emails me the Netlify preview link once generated. Once I’m happy everything looks good, merging this PR would publish the changes live. But at the moment, I’m happy with the weekly manual publishing process.
Eleventy and Notion, working in harmony
That’s all folks. I love the combination of journalling and Notion and grouping and visualising the data in Eleventy. If you follow this same approach, let me know on twitter, I’d love to see your creation.